A useful Kreg trim router setup starts with the model number. Kreg currently sells a corded 1 1/4 HP trim router, item PRSPR125, and a 20V Ionic Drive trim-router kit, item KPTBRT025A. They share 1/4-inch and 6 mm collets, a maximum stated bit diameter of 1 3/8 inches, variable speed, and up to 1 9/16 inches of depth travel. That does not make every base plate, hose adapter, or table setup interchangeable.
The two in-stock ToolCurve accessories covered here need separate compatibility checks. The hose adapter, product 27039, explicitly names the Kreg 20V trim router. The 6-inch acrylic base plate, product 28326, is titled for a “Kreg Trim Router” and its current photography shows the 20V tool, but the page does not state an exact Kreg model number. Neither page establishes fit on the corded PRSPR125. Match the product page, router nameplate, mounting pattern, and owner’s manual before fitting either accessory. This guide is based on current manufacturer and catalog documentation; it is not a report of hands-on testing.
Identify the router before changing the setup
The corded PRSPR125 uses a 120-volt, 6.5-amp motor rated at 1 1/4 HP. Kreg specifies six speeds from 16,000 to 32,000 RPM, an 8-foot power cord, soft start, a clear fixed base, and an included 1 1/4-inch vacuum-compatible dust adapter. Its current product page says it works with Kreg’s trim-router accessory ecosystem, including tables, plunge bases, base plates, edge guides, circle guides, and a hinge-routing jig.
The 20V Ionic Drive router uses Kreg Blue Ion batteries and runs from 10,000 to 30,000 RPM across six settings. Its current kit includes a 2.0 Ah battery, charger, dust adapter, 1/4-inch and 6 mm collets, template guide, and wrenches. The tool adds dual LEDs and rack-and-pinion depth adjustment. Kreg describes an integrated 1 1/4-inch vacuum port on this model.
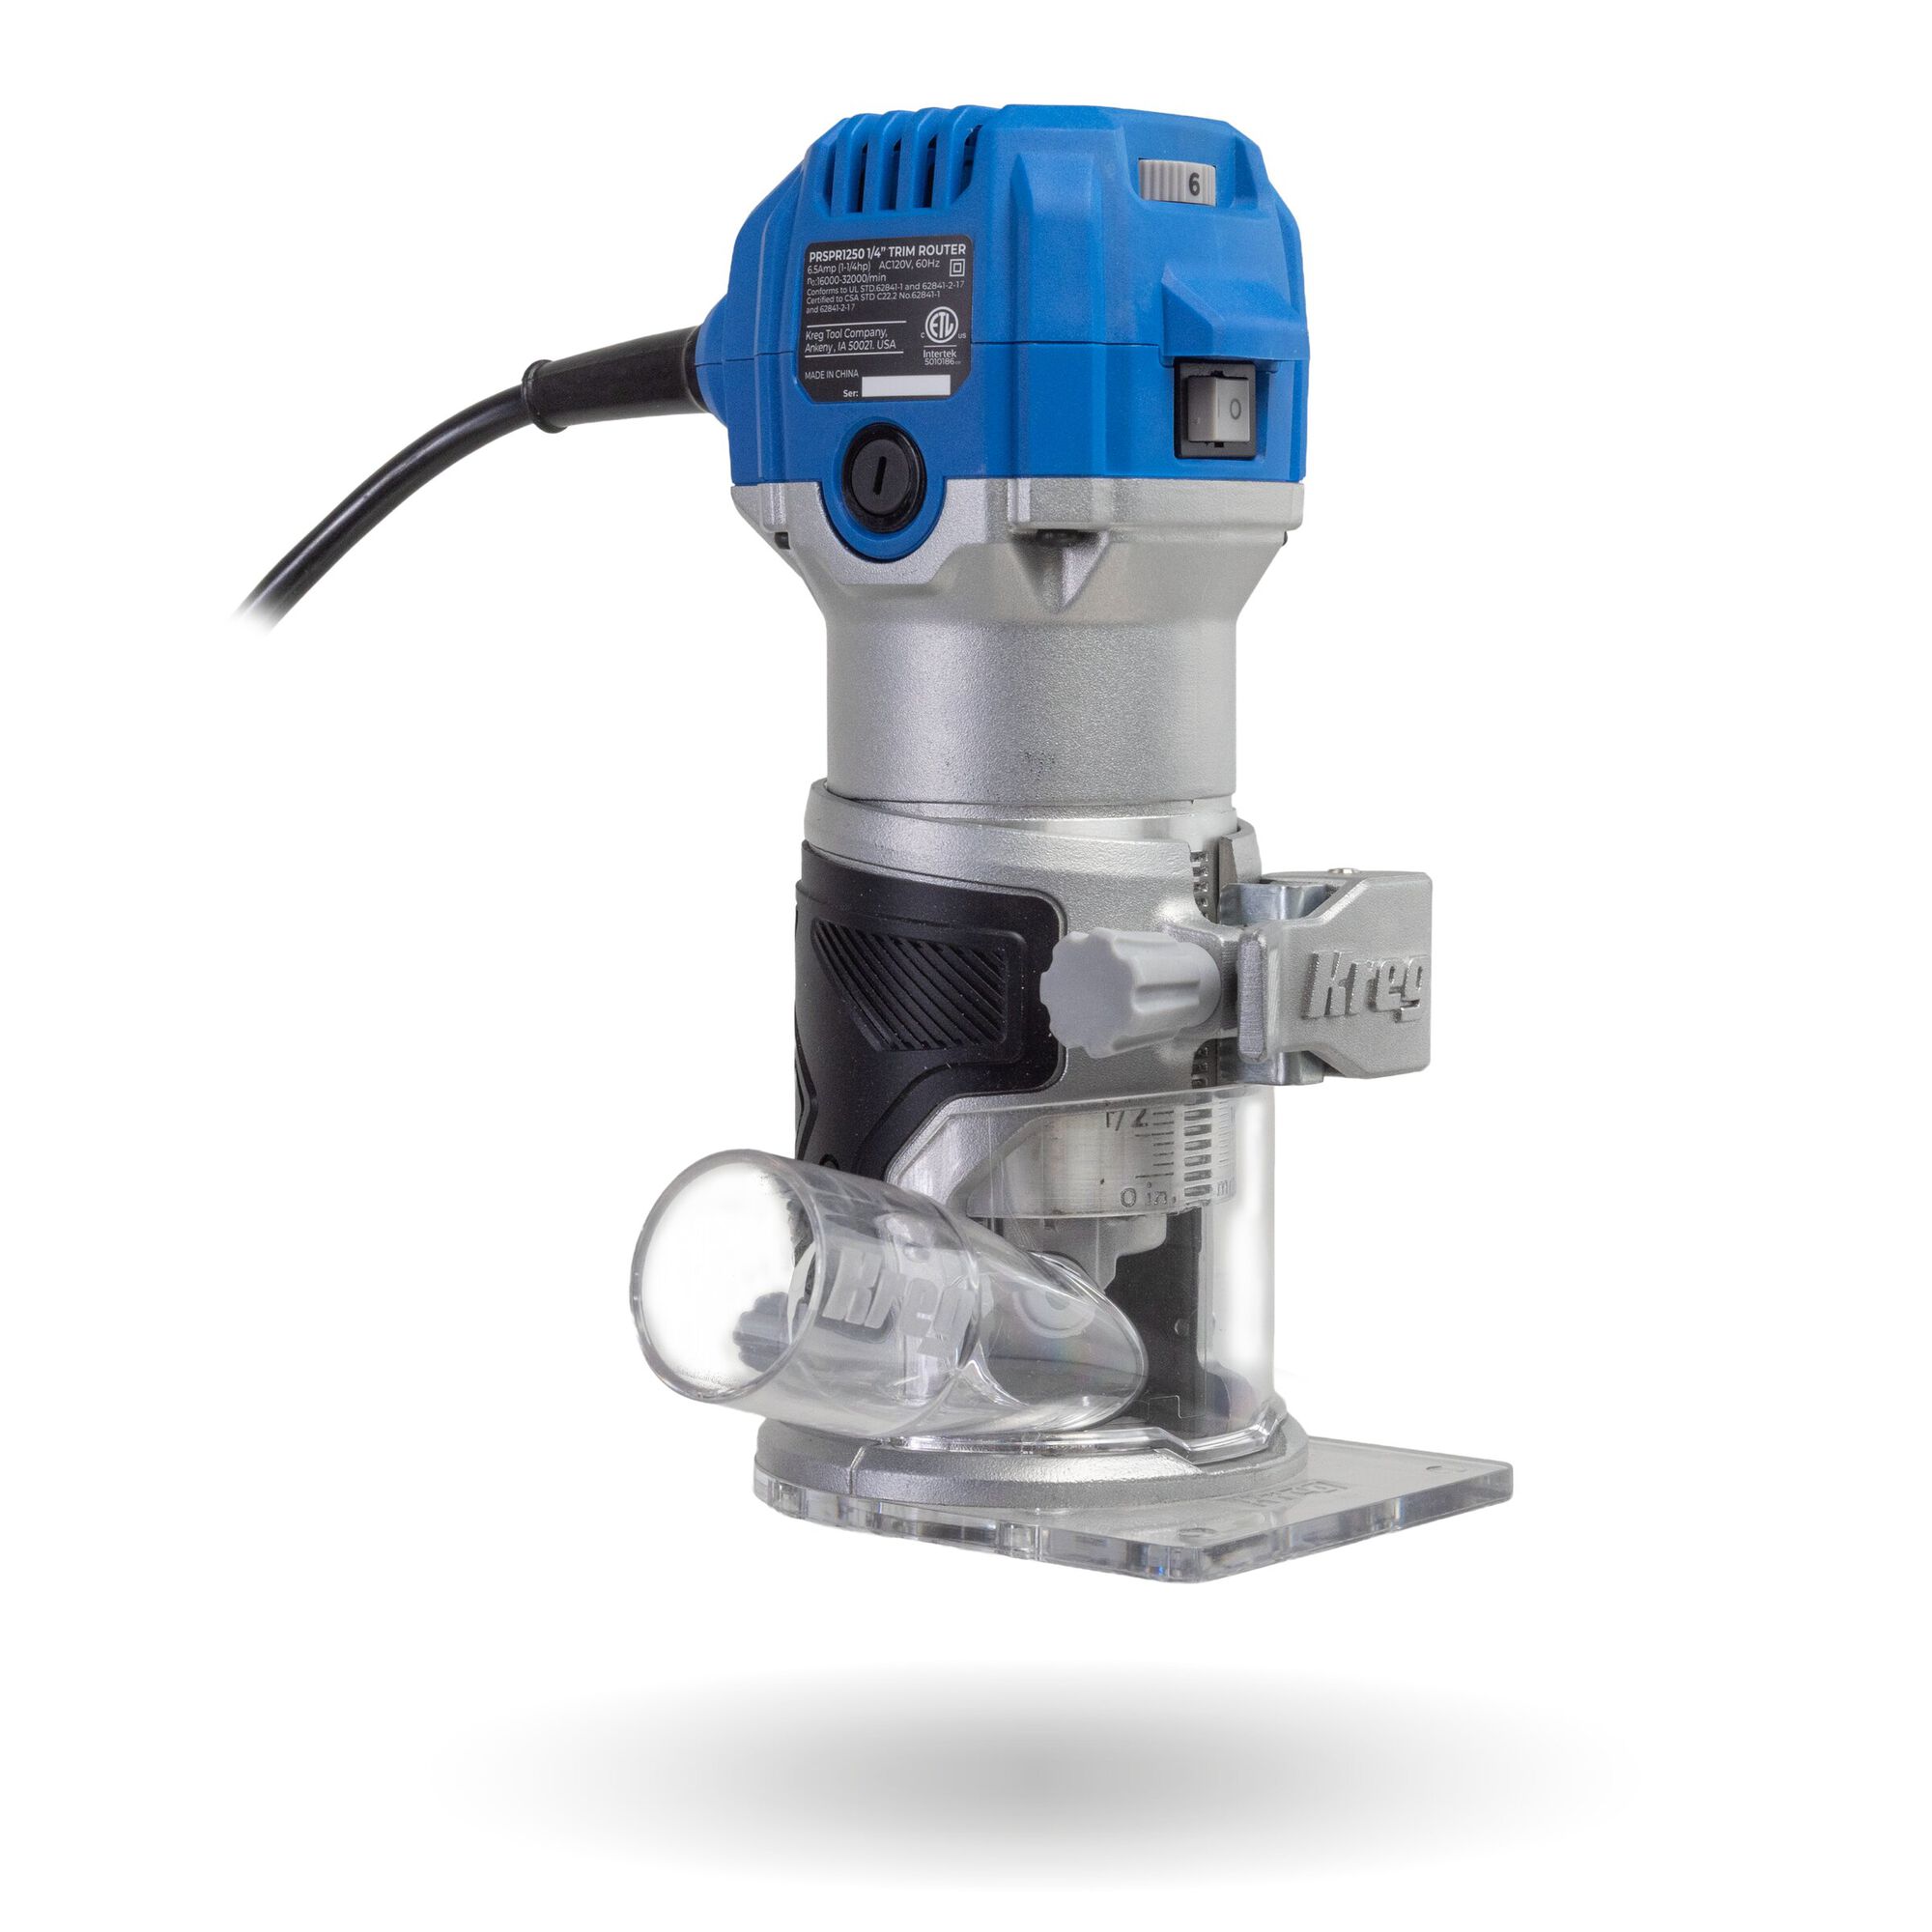
The quickest visual check is the power source: a cord leaves the top of the PRSPR125, while the 20V model carries a Blue Ion battery. Still read the label. Kreg’s manuals use longer item numbers—PRSPR12502 for the corded manual and KPTRT02502 for the 20V manual—so compare the complete identification on the tool rather than relying only on color or a retailer’s shortened title.
Baseline setup before the first cut
- Remove the energy source. Unplug the corded router or remove the battery from the 20V router before installing a bit, changing the collet, moving the base, or attaching an accessory.
- Inspect the bit and collet. Use a sharp, undamaged router bit whose shank matches the installed 1/4-inch or 6 mm collet. The PRSPR125 manual instructs the user to seat a bit fully and then raise it about 1/8 inch before tightening. Never tighten an empty collet.
- Confirm clearance. Both current routers are specified for bits no larger than 1 3/8 inches in diameter. Turn the spindle by hand with power disconnected and make sure the cutter cannot touch the base opening, dust nozzle, template guide, or added plate at any intended depth.
- Set only the needed depth. Lock the base and make a shallow trial pass in scrap. Deep cuts increase load and make the router harder to control; use multiple passes when the bit profile or material calls for them.
- Choose speed from the bit guidance. Kreg tells users to follow the bit manufacturer’s speed recommendation. A router’s maximum RPM is not a default for every cutter or material. Confirm the dial setting before reconnecting power.
- Secure the work. Clamp and support the stock on a stable surface, clear the area below a through-cut, and keep the entire base supported at the start and end of the pass.
Start the router with the bit clear of the work. Let soft start bring the motor to speed, keep the base flat, and use a steady feed that does not overload the motor. Kreg’s manuals warn against uncontrolled climb cutting. Follow the feed-direction diagram in the manual for the edge or opening being routed, and make a light practice cut when the grain direction or geometry is unfamiliar.
When a larger base plate helps
A compact factory base is maneuverable, but it can lose support when most of the opening passes beyond an edge, narrow rail, or template. A larger round plate increases the footprint that remains on the work. That can make edge profiles, template work, grooves, and broad recesses easier to keep level.
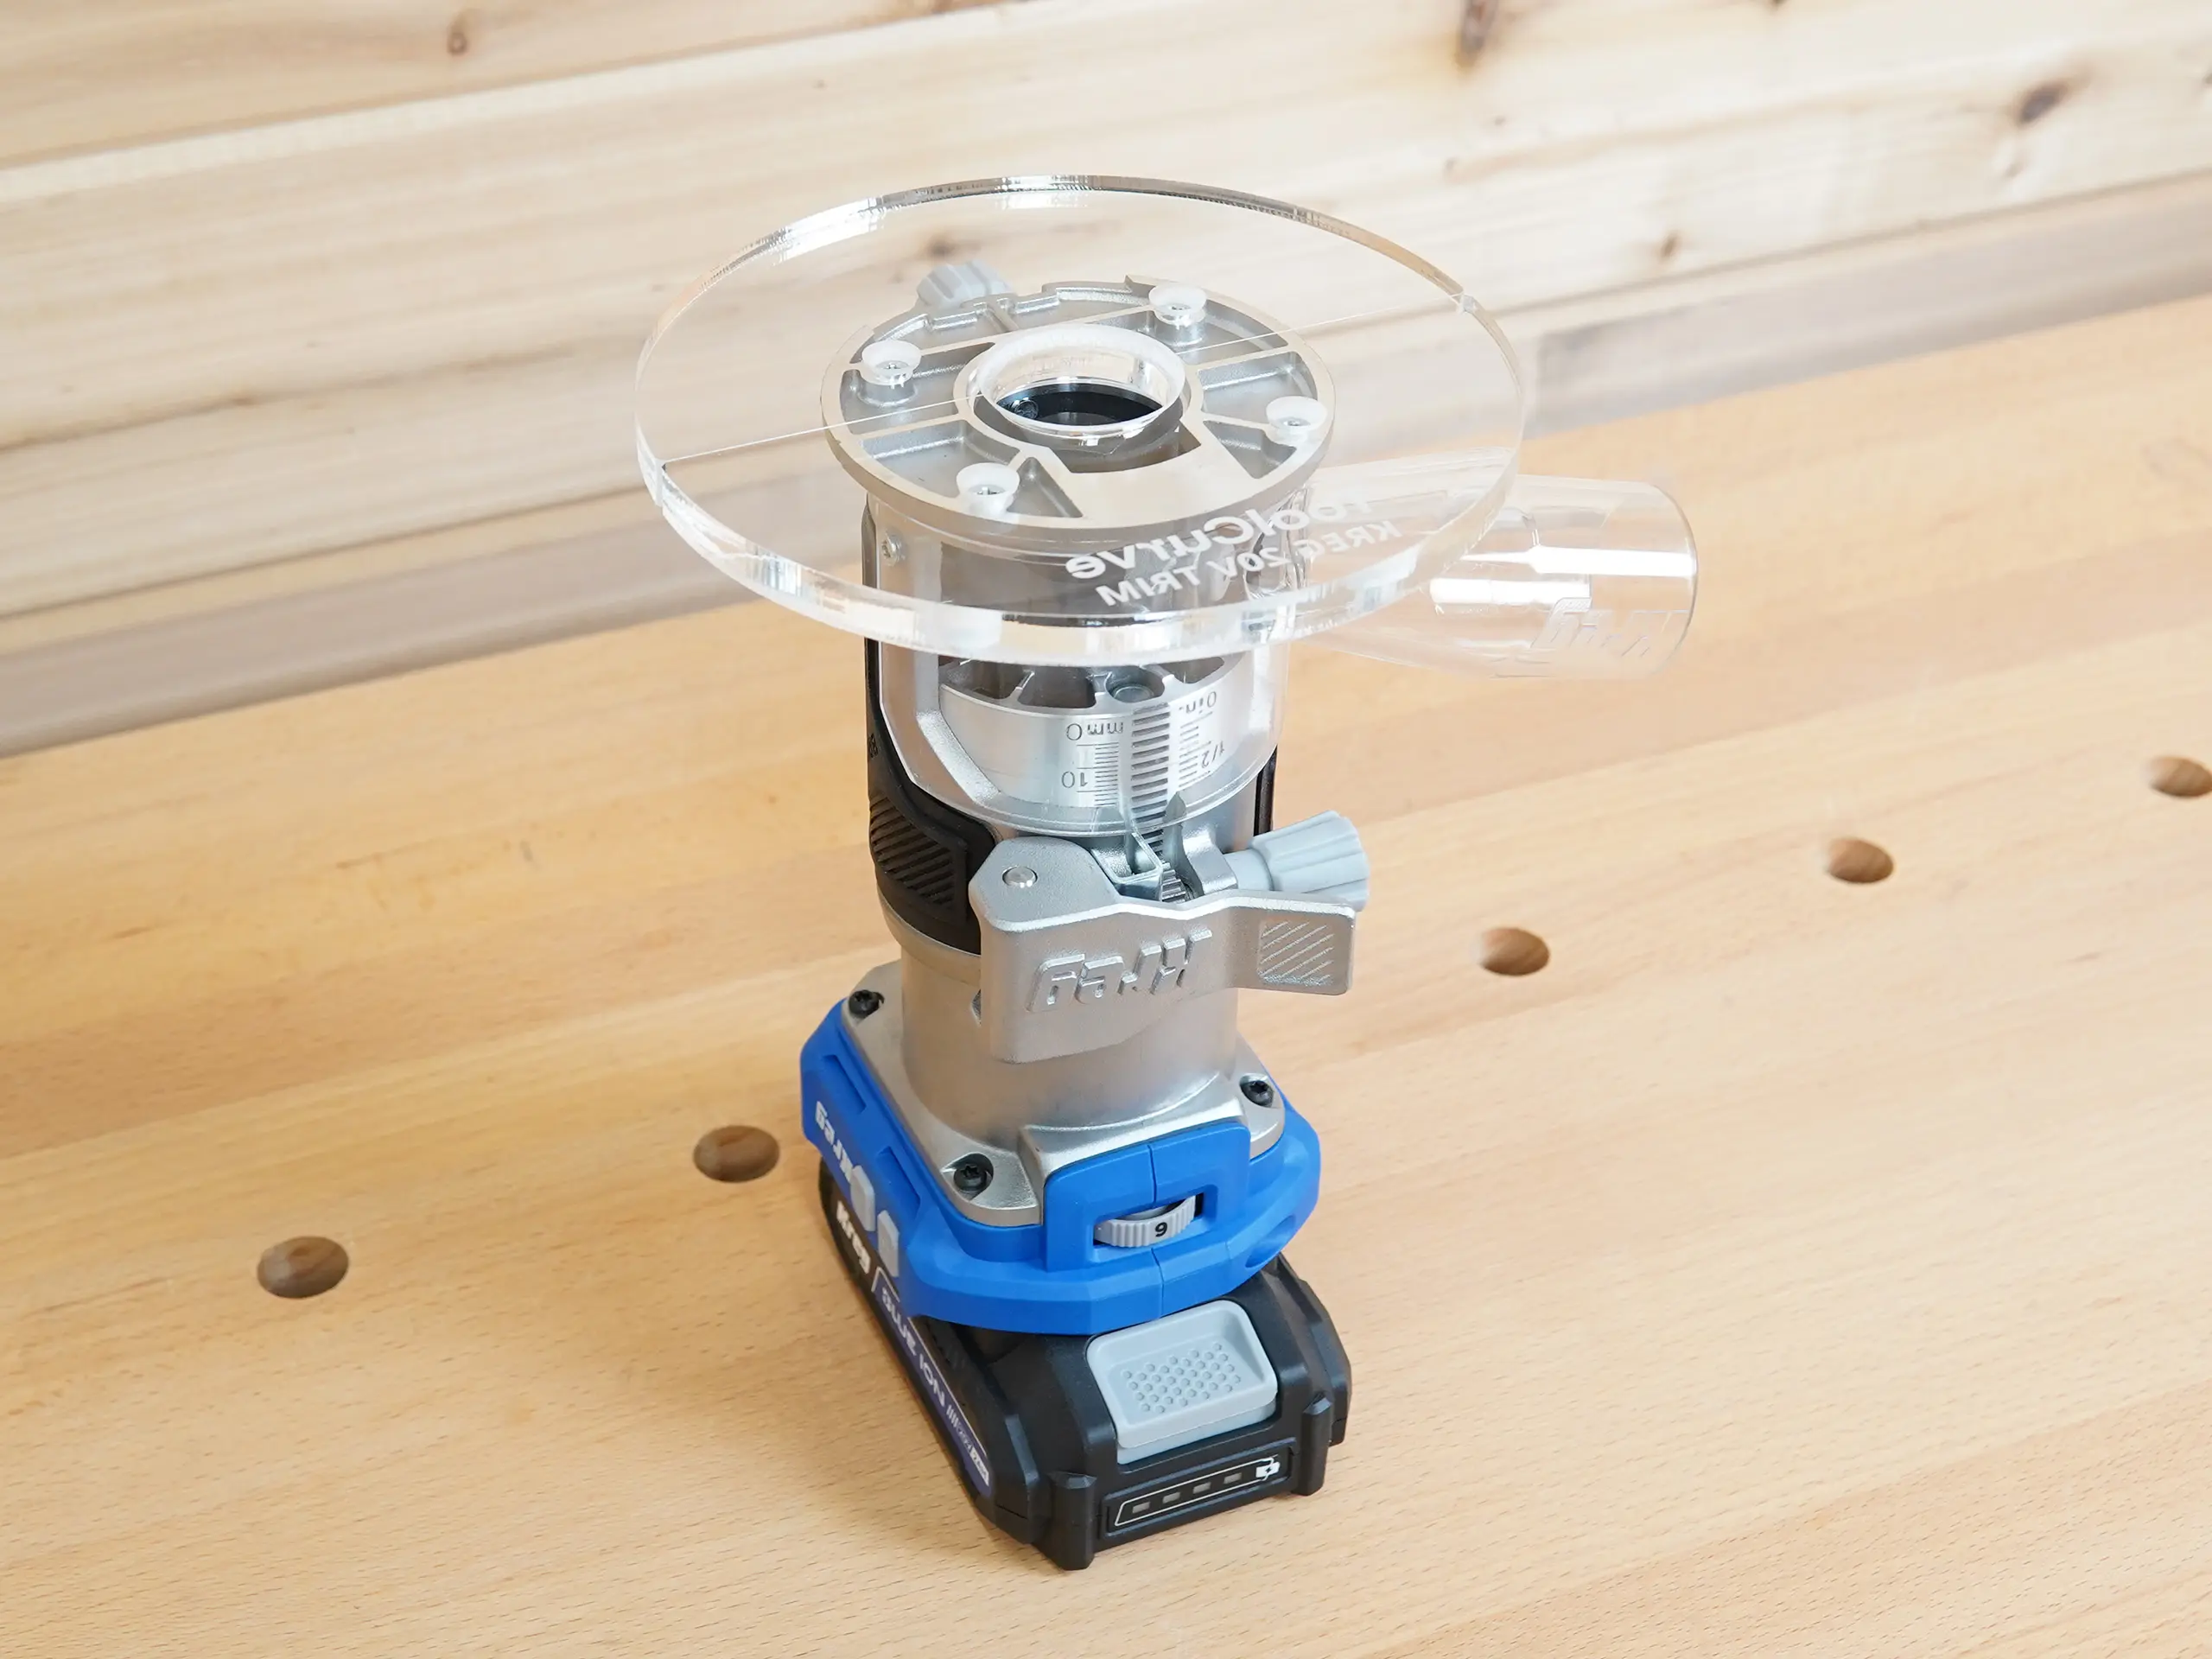
The in-stock ToolCurve 6-inch acrylic base plate for the Kreg trim router is shown on the 20V tool, but its current page does not publish an exact model number. ToolCurve specifies a 6-inch diameter and 3/8-inch cast-acrylic construction. The clear material preserves a view of the bit and layout marks, while the larger circle supports more of the router as a cut approaches an edge. Verify the plate’s hole pattern against the exact router before purchase.
Install it only with the router unplugged or its battery removed and with the correct supplied or specified hardware. Centering matters: an off-center plate can make template or guide-bushing offsets inconsistent, and a screw that protrudes can scratch the work. After installation, check that the plate sits flat, all fasteners are secure, the depth mechanism still locks, and the bit clears the opening through the full intended range. Test the setup on scrap before using a layout line or template that cannot be replaced.
A larger base improves support; it does not turn the trim router into a plunge router or eliminate tipping. Keep two hands on the tool where the operation permits, avoid reaching past the supported portion of the plate, and reposition the work or template when the base would bridge an opening poorly.
Connect dust collection without adding steering force
Both Kreg routers include a dust connection, but the hose still has to fit the actual router and move freely. For the 20V model, the in-stock ToolCurve hose adapter for the Kreg 20V trim router is designed to connect that router’s dust port to Festool 27 mm or 36 mm hoses and common shop-vac hose sizes through selectable versions. Choose the version that matches the hose you own; do not force a nearly fitting cuff onto the router’s clear dust nozzle.
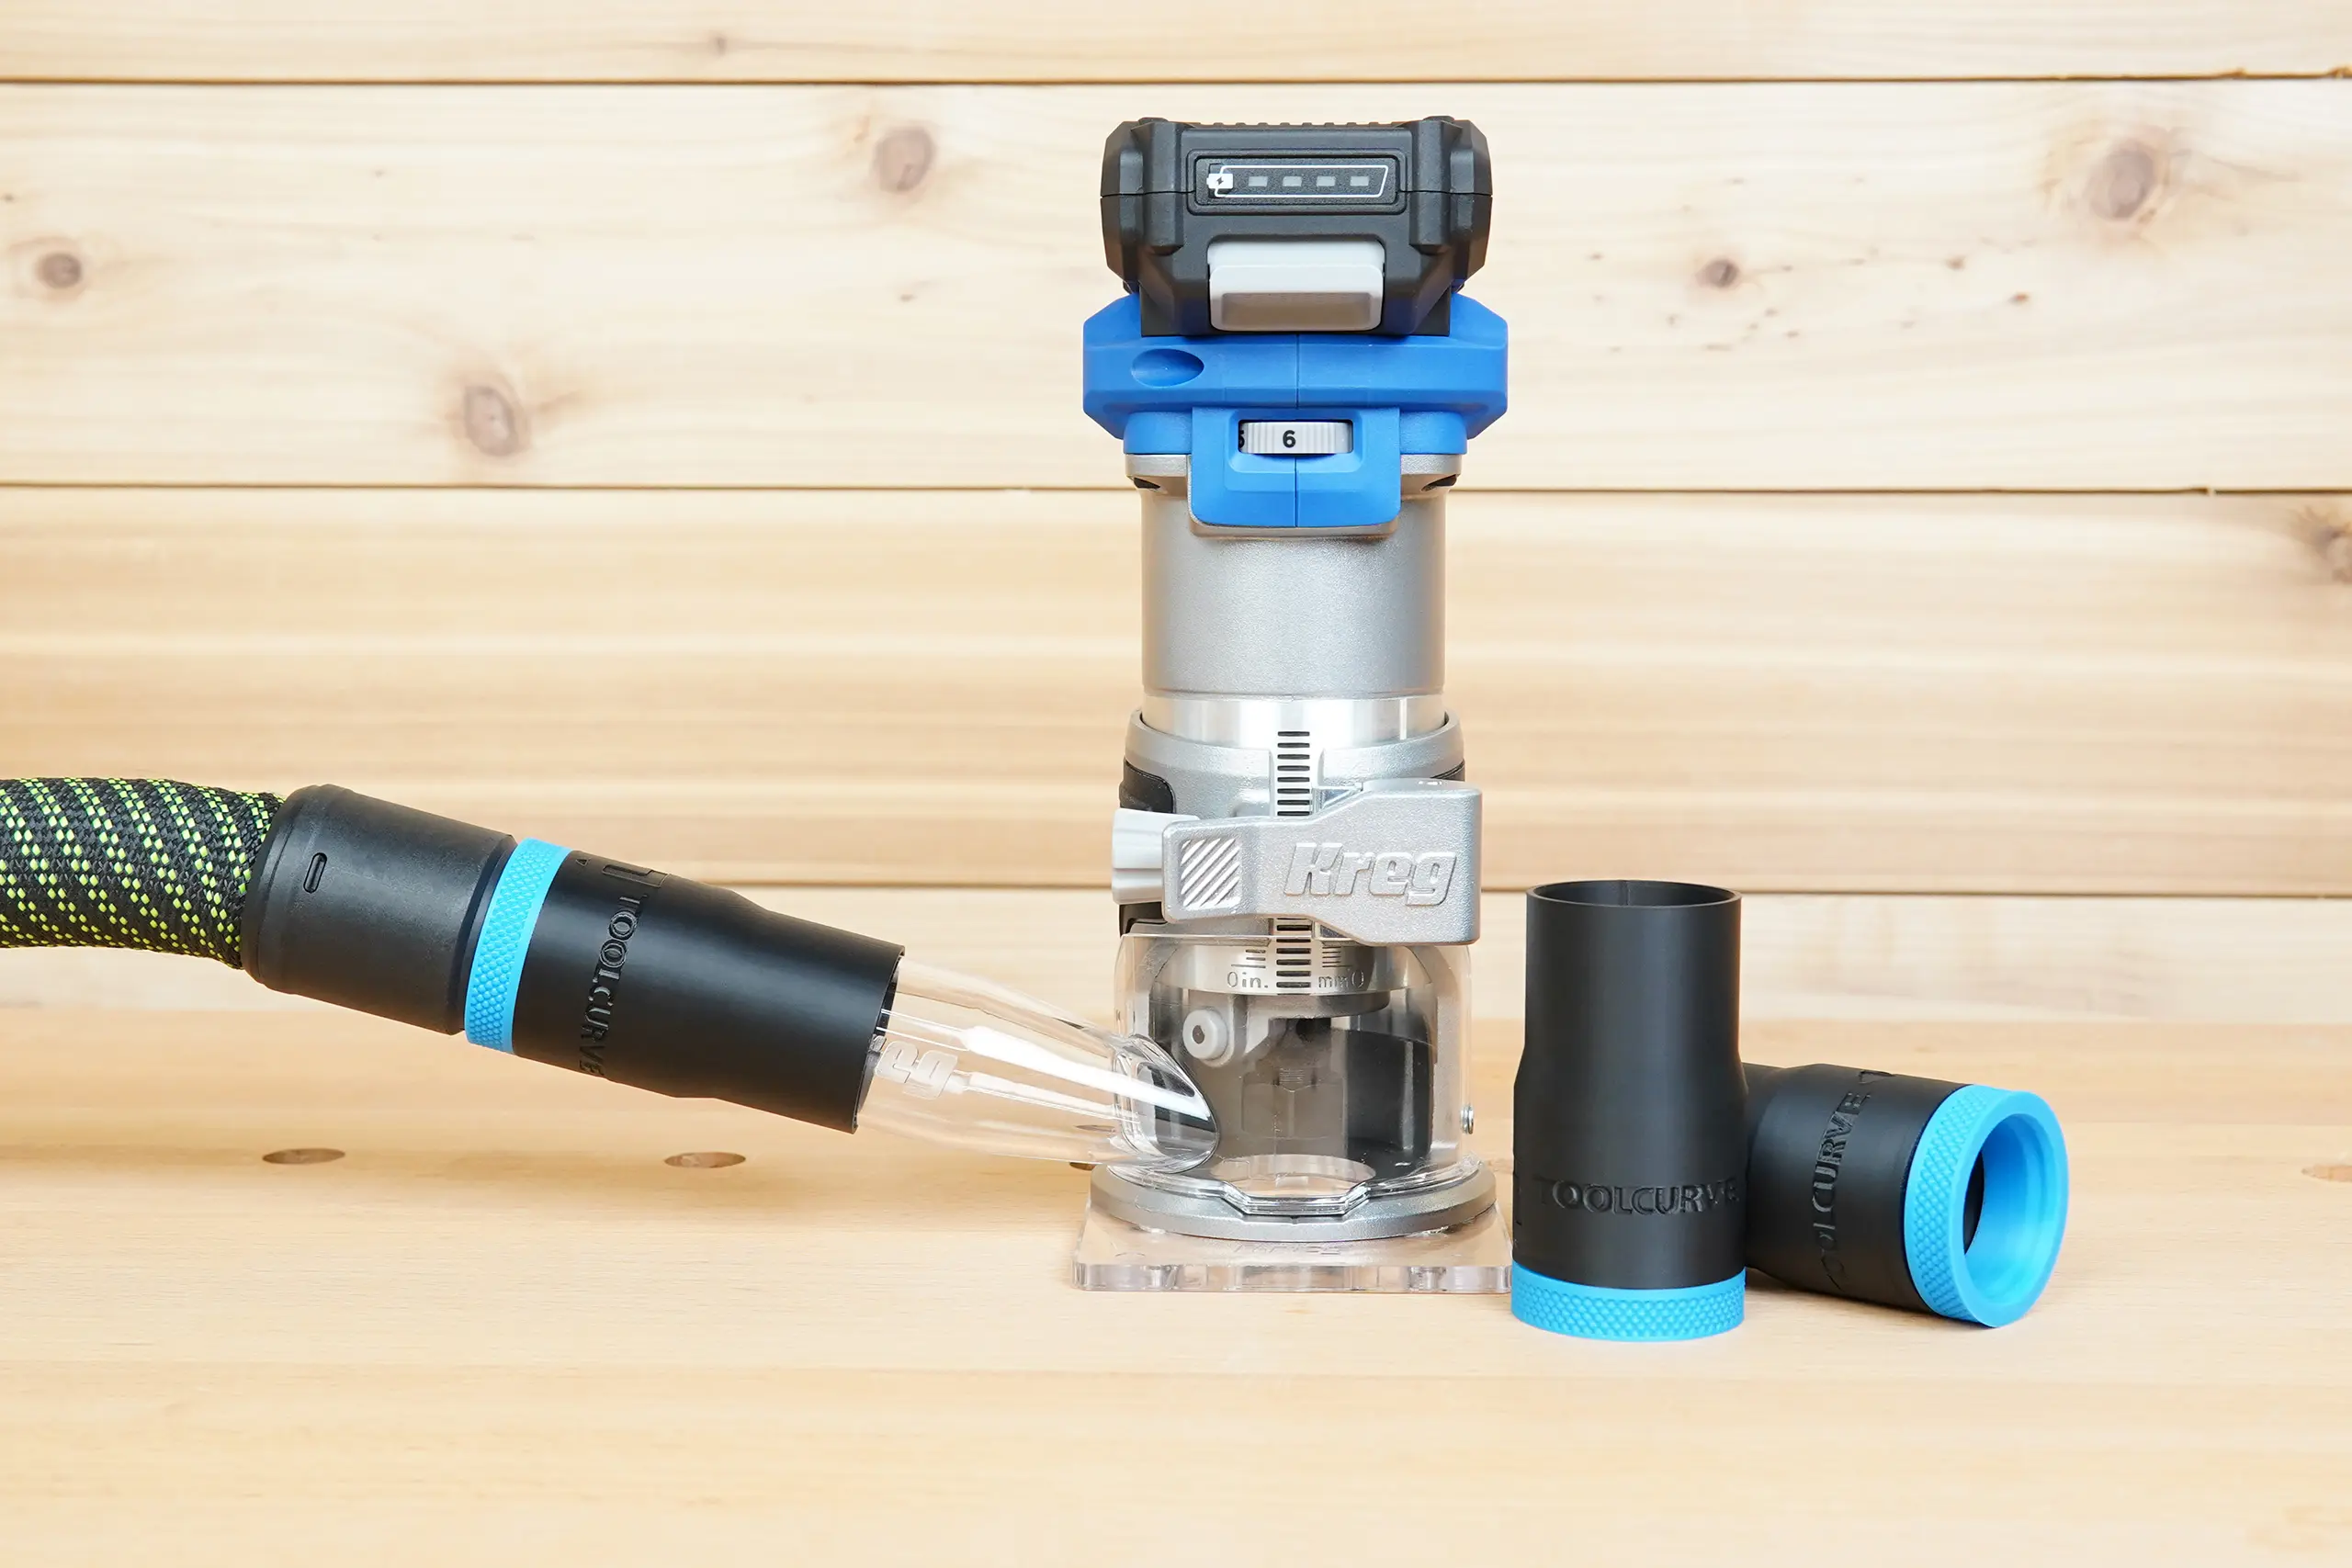
With the router de-energized, seat the factory dust nozzle and hose adapter fully, then tug lightly on the hose to confirm the joint is secure. Route the hose behind the direction of travel with enough slack to complete the pass. A heavy or tightly coiled hose can steer a compact router sideways, so support it from the bench or overhead when necessary. Make a dry run with the tool off and watch for catches on clamps, corners, and the workpiece.
Dust collection improves visibility and captures many chips, but it does not collect everything. Keep the work area ventilated and use eye, hearing, and respiratory protection appropriate to the material and the router manual. Empty or service the extractor before airflow drops, and inspect the clear nozzle for packed chips between passes.
Router-table use is model-specific
The current PRSPR125 product page explicitly lists tables in its compatible Kreg accessory ecosystem. For that corded model, use a table or insert plate that names the router or provides an approved mounting method. Make sure the plate is flat and locked, the router is securely fastened, the bit opening and guard fit the cutter, and a suitable external switch lets the operator control power without reaching below the table. Follow the table manual as well as the router manual.
The 20V router is different. Its current owner’s manual states, “Do not use in a router table.” That instruction controls this guide even though other Kreg pages discuss trim-router tables in broad terms. Do not mount the 20V tool under a table unless Kreg supplies current, model-specific written instructions that supersede the manual for the exact router and table combination. The ToolCurve 6-inch handheld base plate is not a router-table insert plate.
Table routing also reverses the relationship between tool and work: the bit is fixed and the stock moves. Use a guard, fence, featherboards, push aids, and a starting pin where the table and operation call for them. Keep hands away from the cutter, disconnect power before adjustments, and never start with the work touching the bit.
A repeatable setup checklist
- Read the nameplate and match the corded PRSPR125 or the 20V Ionic Drive model.
- Use only accessories whose current documentation names that router.
- Unplug the cord or remove the battery before setup.
- Match the bit shank to the collet and stay within the 1 3/8-inch bit-diameter limit.
- Check bit, base, plate, guide, and dust-nozzle clearance by hand.
- Set speed from the bit manufacturer’s recommendation.
- Lock the depth and prove the cut in scrap.
- Clamp and support the work; keep the base flat throughout the pass.
- Support the dust hose so it cannot pull the router off line.
- Use the PRSPR125 in a table only with a compatible system; keep the 20V model out of a router table under its current manual.
The best setup is not the one with the most accessories. It is the one in which the router, base, dust connection, bit, and support method all match. Begin with the exact model, add one change at a time, and confirm clearance and control before moving from scrap to the project.
Comments